1.1 Monitor stand
Monitor Stand
Low-cost, parametric desk stand with a bamboo rod shaft and printed parts.
Project brief
What it needed to do
- Design a low-cost, 3D-printable monitor arm with a base.
- Use a minimum amount of plastic to reduce cost and print time.
- Height-adjustable; support monitors up to 27″.
- Standard VESA mount compatibility.
- Accommodate uncertainty in final rod dimensions.
- Minimal hardware and straightforward assembly.
Design process
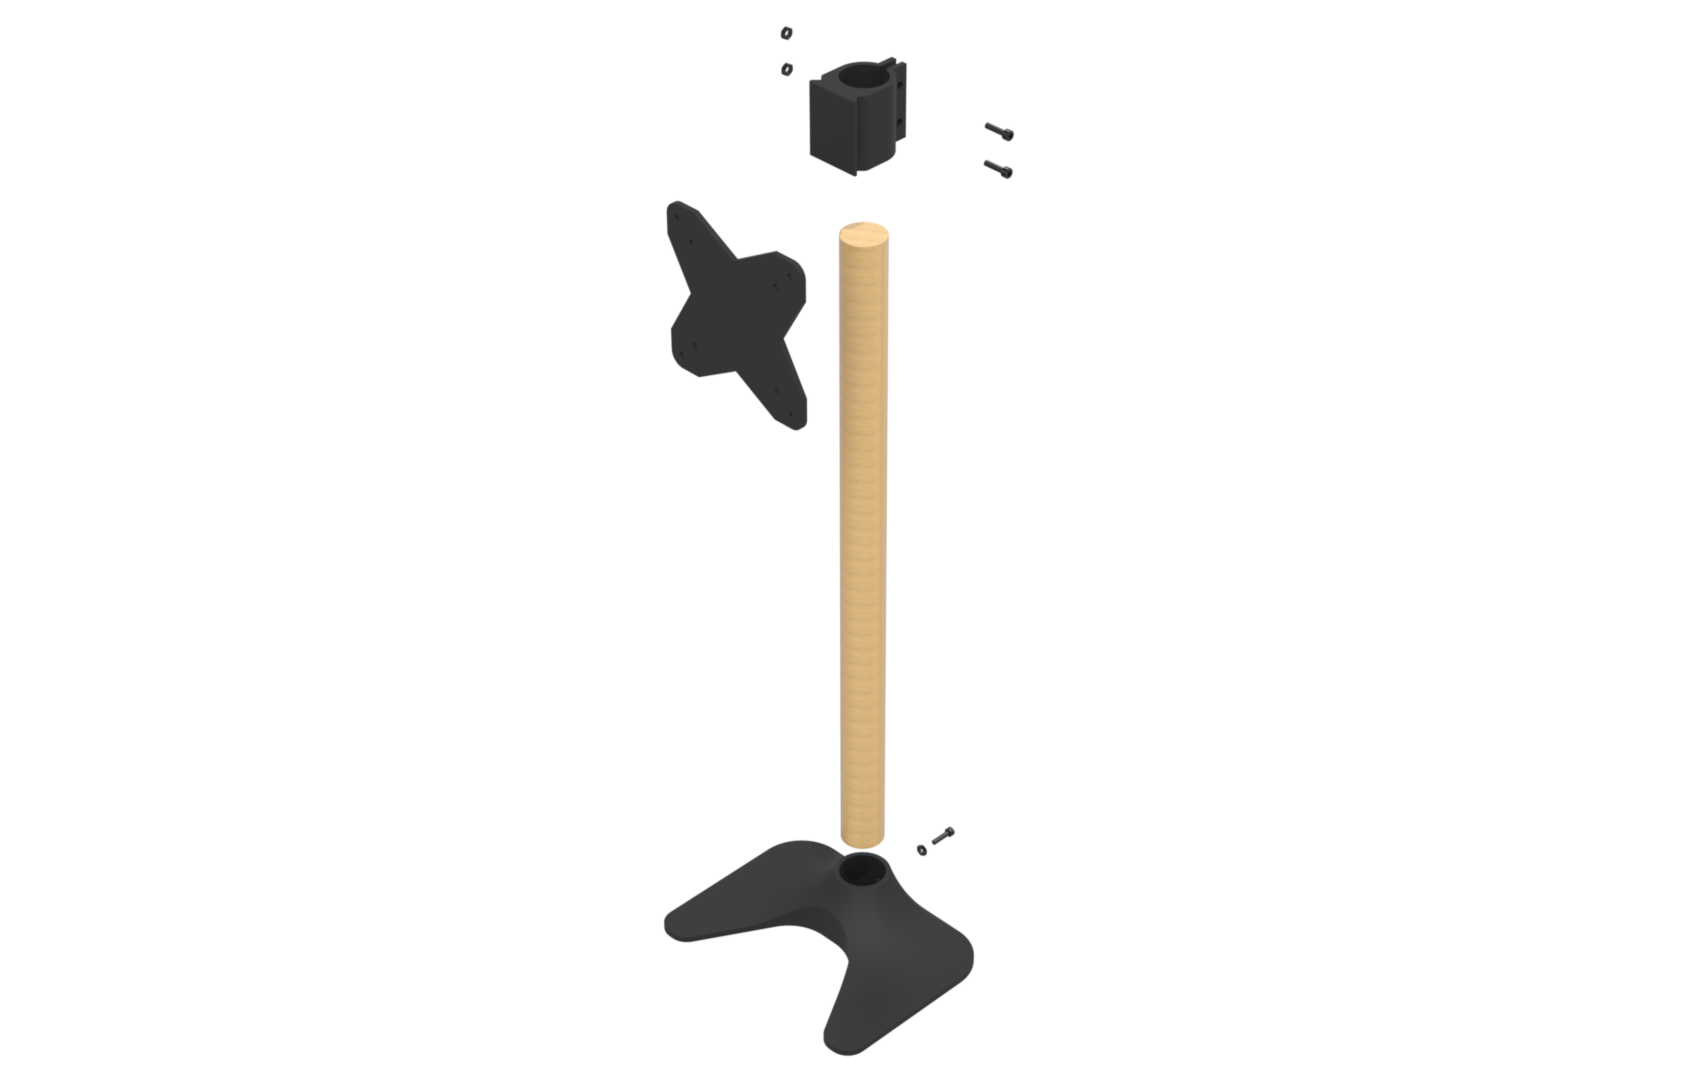
The design process began with minimizing material use. The goal was a stand people can build from widely available materials: a bamboo rod as the shaft, three M5 bolts and nuts, and PLA for printed parts.
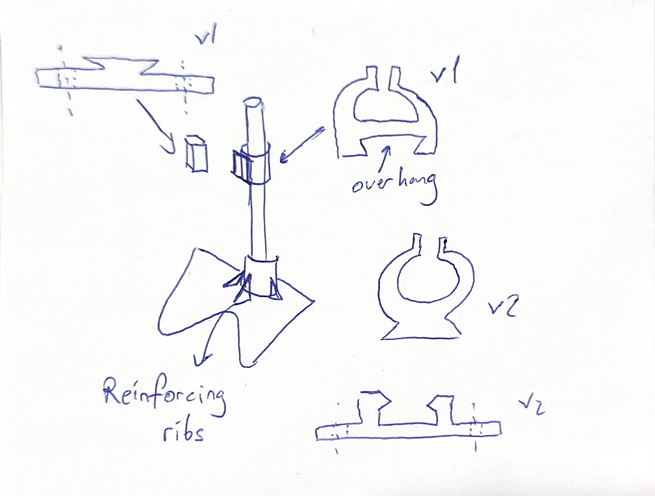
All printed parts were designed so that no support material is required. PLA is not ideal under sustained creep loads; ABS is a better choice for anyone printing in an enclosed printer.

1.1 Monitor stand
Assembly instructions
-
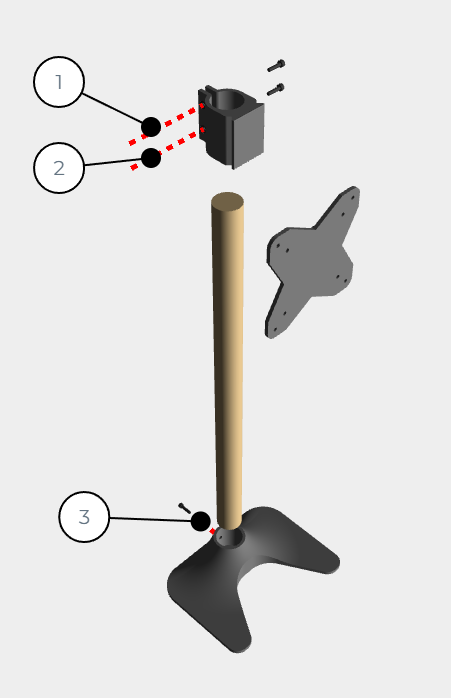
Step 1 Heat-insert the M5 nuts (1), (2), (3) into their places.
-
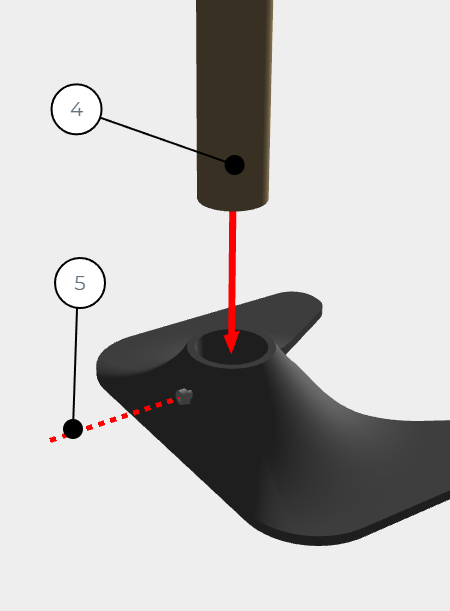
Step 2 Insert the rod into the base. Secure with the bottom set screw (5).
-
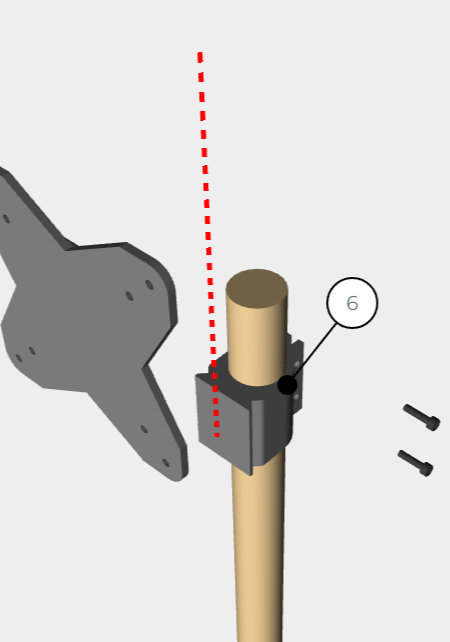
Step 3 Slide the VESA mount attachment (6) onto the rod.
-
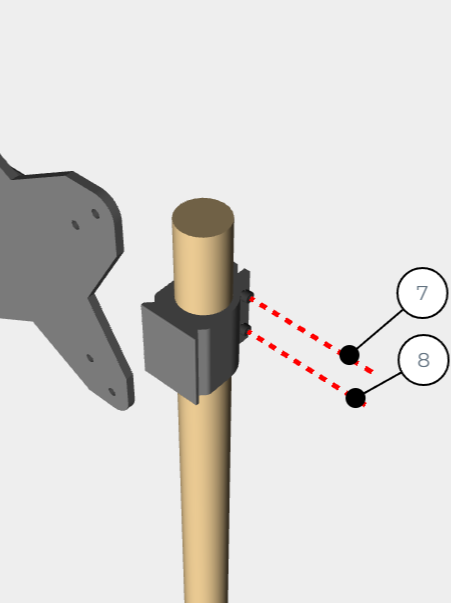
Step 4 Secure the attachment with set screws (7), (8).
-
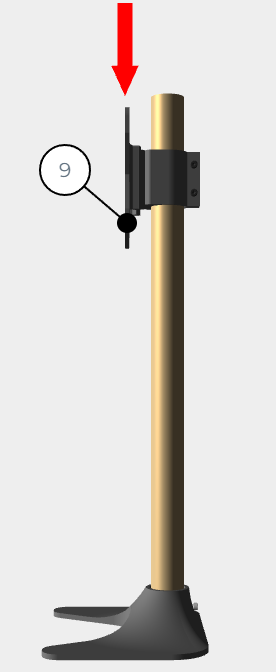
Step 5 Slide the VESA mount plate (9) onto the part (6).
1.1 Monitor stand
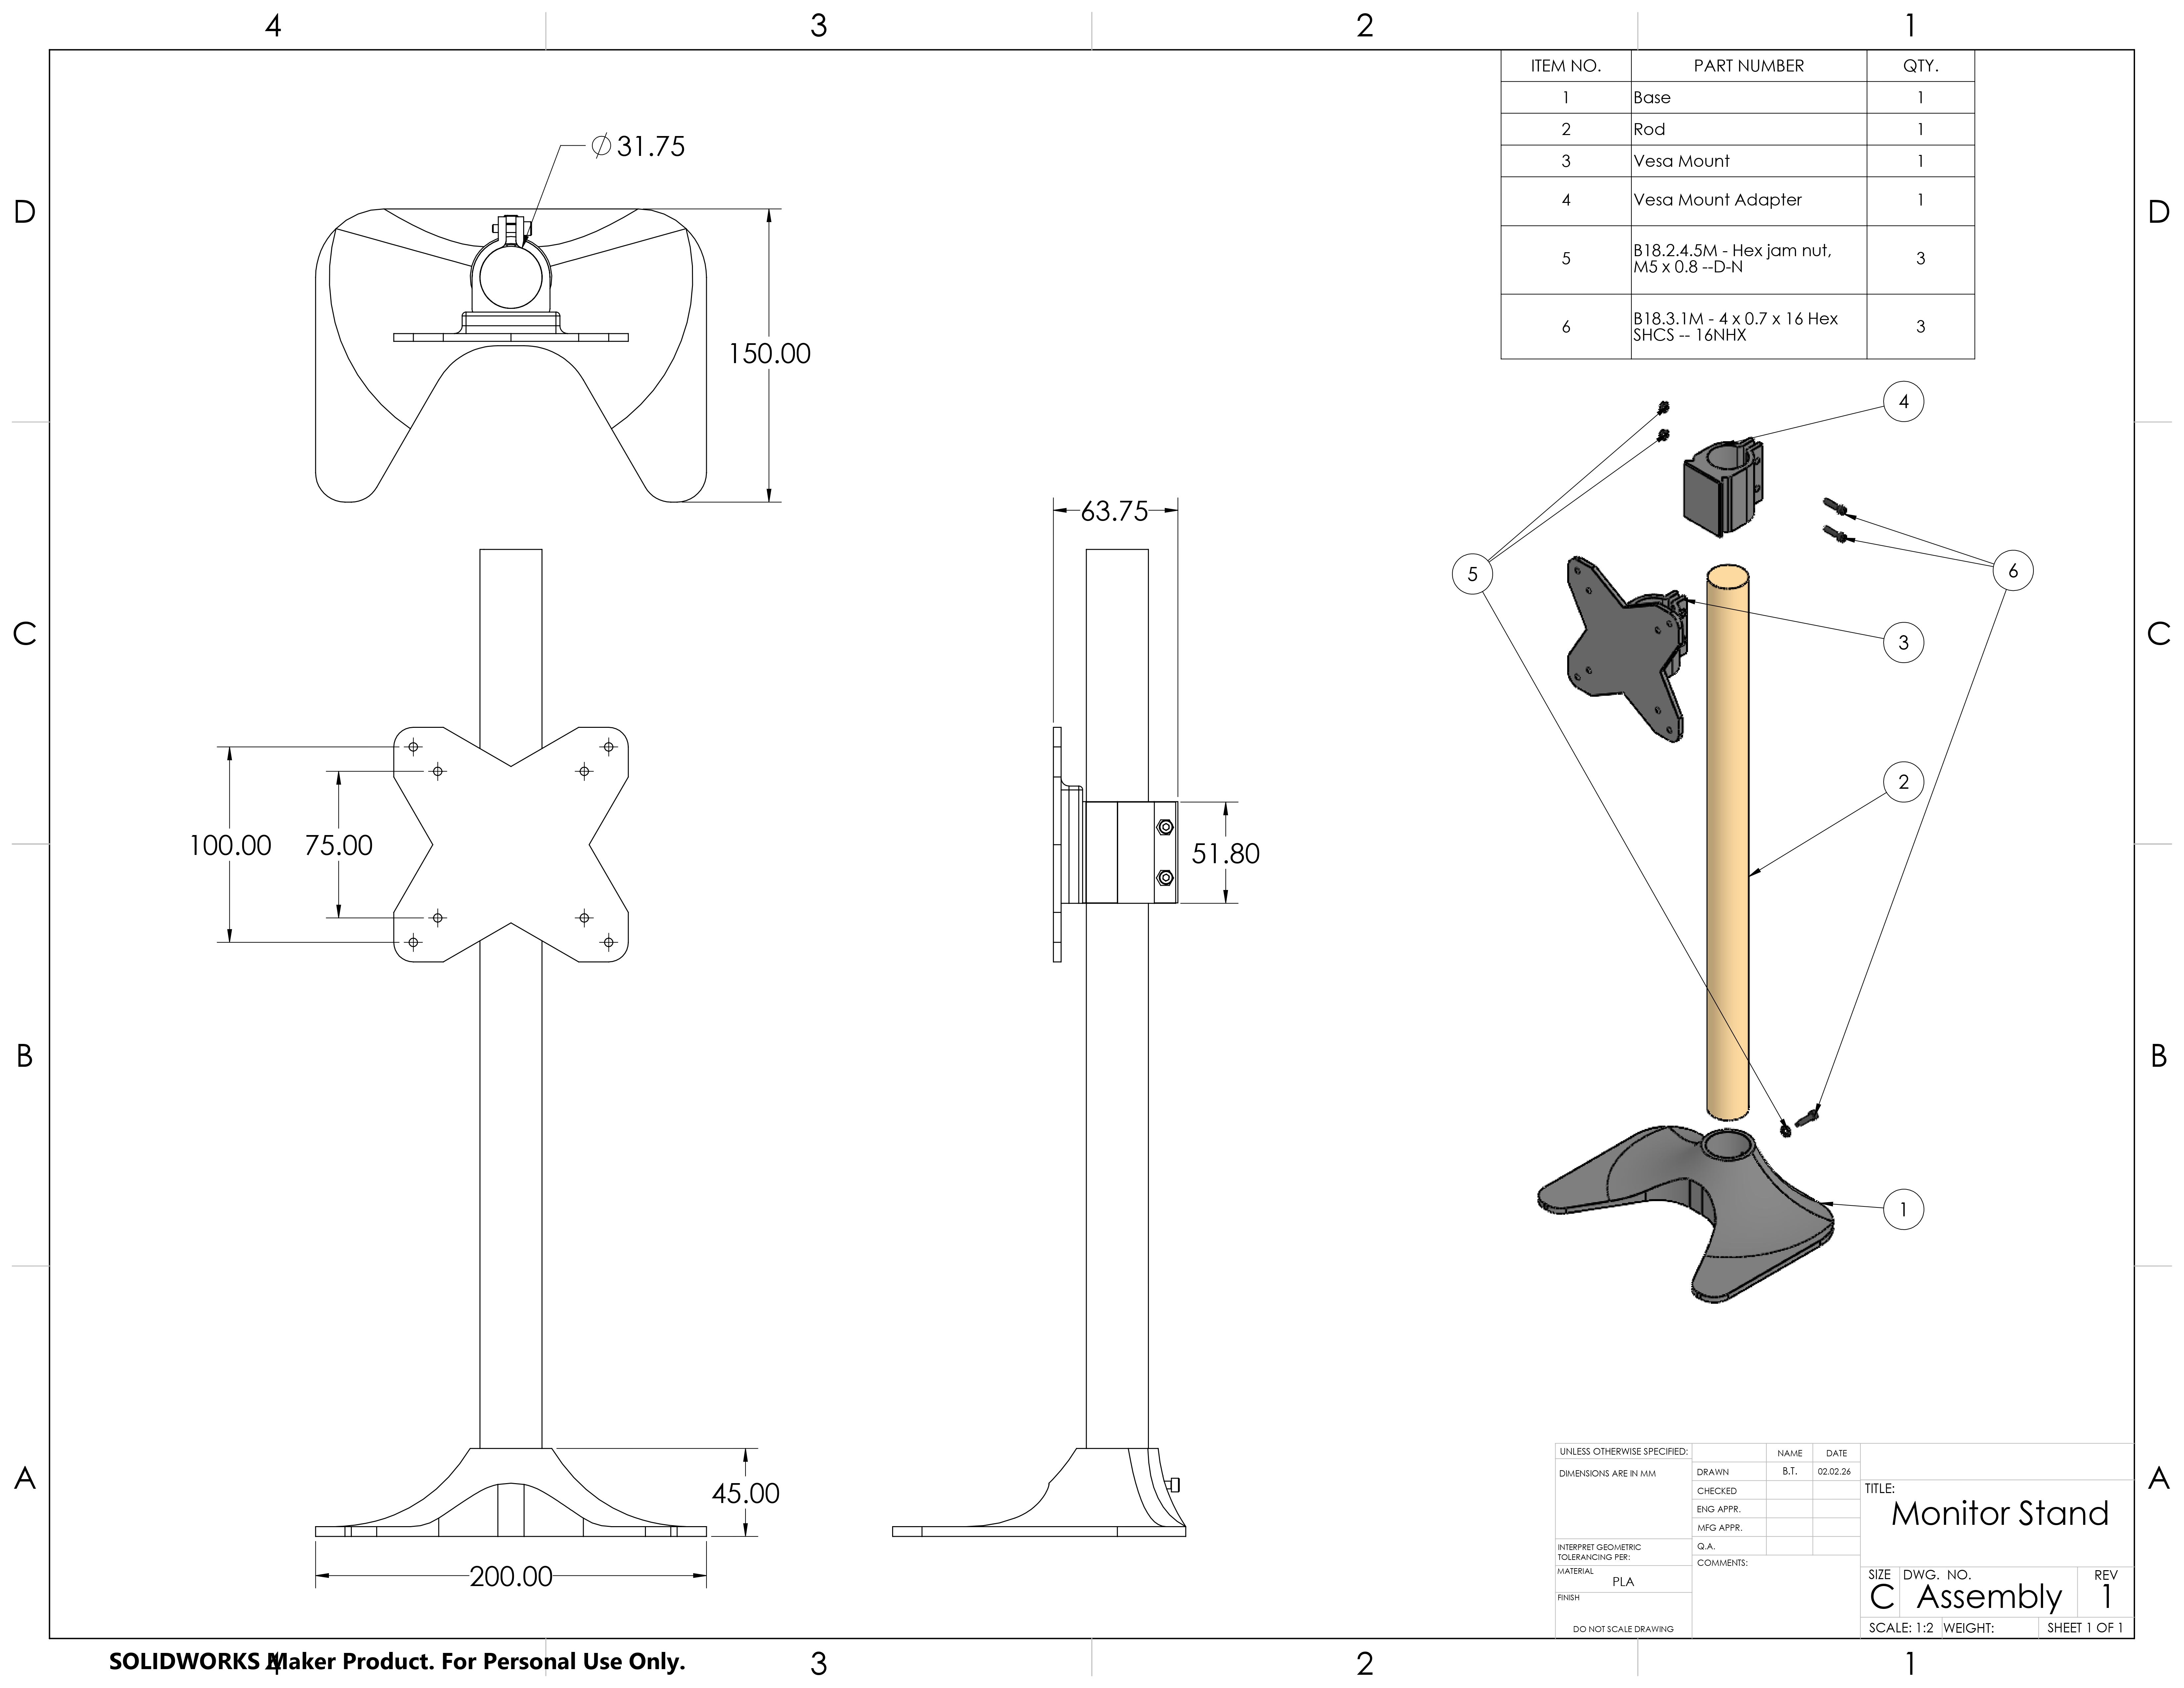
Dimensions & bill of materials